Thursday, July 28, 2011

Week 17

Tonight we finished most of the woodworking. We just have to make a few more holes for buttons and joysticks, but it is pretty much done.

I had to use this page to figure out the radius of the circle that would draw the curve on the front of my control panel. Turns out the radius of that circle is right at 6 feet. We made this contraption to help us draw it...


It is just a long piece of trim with a nail 6 feet from one end and I used a sharpie on the edge to make the line. It was a little tricky to get it all lined up right, but it worked pretty well. In the shot below you can kind of see my scribbles from figuring up the proper radius:


And here is the full control panel shape made of wood, sitting back on that same kitchen counter from where we did the mock up on week 1:


And here the whole thing is with the control panel balanced on the cabinet back at my garage:


Pretty much now we just have to get some button and joystick holes put in the top (I need to decide on a button layout and placement first) and route a couple of slots for t-molding and it will be down to just the painting and wiring. Exciting times!

Week 16.5

I had some time today so I got a start on the control panel. I got the bottom and the sides cut out and attached to each other, and I got the top and sides mostly cut out. This was the last thing keeping me from bringing the cabinet home (I needed the cabinet to make sure I was making the cp the right size).

So, Alicia came over and we were able to fit the cabinet in the back of the 4 runner and it is now resting nicely in our garage.

The photo below shows it with the sides and bottom of the control panel balanced on it.


Wednesday, July 20, 2011

Week 16

Huge milestone tonight! The construction of the cabinet body is officially done! We still need to fill holes and stuff like that, but it is completely built.

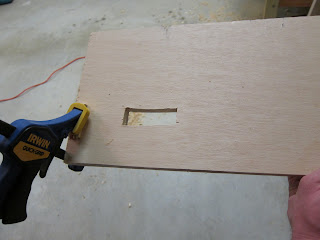
First, we finished installing the speaker shelf (just screwed it in, it was clamped on for the picture last week). Then we created some recessed button holes on the back of the cabinet for power on/off and administrative functions:


Here is one of them with a button in place:


And... the completely built cabinet:


Now we are starting to plan the control panel, and we got lucky again and found another leftover piece that was the exact width we needed. Makes sense because we cut several pieces to the overall width of the cabinet, but it is nice that we are still working through those and that the leftover pieces are falling into place for us now. Nice to not have to cut every little thing anymore.

It feels really good to have the cabinet itself built. It seems like it has taken us forever but it looks really good and has been a fun process. It will be nice to see it with the control panel on it.

Week 15.5

We had a chance to get together and knock out some cabinet work this past weekend. We were really productive and the cabinet is getting pretty close to being built now and we'll be moving on to the control panel soon.

We got the back bottom panel attached and it turns out that we had a "scrap" piece that was the exact right size for the removable access panel on the back:


We installed some magnetic cabinet latches to hold the removable panel in place. We used 4 of them, one in each corner:


Installed a knob to take that panel off and put it back on. This is a chrome knob which should pretty closely match my t-molding:


On the front, we got the coin door mounted and the front panel attached:


And we cut out the slots in the speaker shelf:


It is really coming together. Next steps are... mount the speaker shelf, make a hole in the back to run the power cord in and out, mount some admin buttons on top of the cabinet, and move on to building the control panel!

Thursday, July 14, 2011

Week 15

We are moving along pretty well now. A new saw took care of our "jigsaw situation" so we were able to cut out holes for the coin door, the ventilation fan, and the cat5 wall plate. There isn't a whole lot left to do on the cabinet part now, just one more panel to cut and attach and the speaker shelf needs some slots cut and that should be it. Then we will be ready to start building the control panel.

Did I mention there were MAME night cupcakes?!?!


Monday, July 11, 2011

Coin Door

This weekend I worked on a little coin door modification project on my own. I had a blank coin door, but I wanted insert coin buttons on it.

I had some of these cool NovaGemCDR buttons that I got specifically for this purpose, so I decided to try to mount them to the door. I also have some coin return bezels that I am going to attach just for looks. I was a little worried that I was going to screw it up and destroy my shiny new door, but it turned out great!


My door before modifications...


Planning out where things should go...


I marked my spots with some stickers from my son's sticker/coloring book (he doesn't like the stickers so it is ok :))...


Then I drilled holes and mounted the buttons. Here they are...
Yay! It looks great and no major mess ups. I still need to glue those bezels on but that should be pretty simple.

Wednesday, July 6, 2011

Week 14

We had some issues with the jigsaw tonight. This was actually our second time to try to use it, with the same results as before. The blade will not stay inserted long enough to cut more than about a quarter of an inch. This really hurt our productivity because we are to the point where we need to cut out holes for a fan, a coin door, and an ethernet jack. A jigsaw is really the right tool.

We think the one we have might just not be a very good model. We are going to try to have a better one by next week.

Even with the jigsaw problems, we managed to be pretty productive. We have all but one of the face pieces cut out now, we just need to get the holes in them in the right spots before we fasten the pieces on for good.


Thursday, June 30, 2011

Week 13

Still moving right along. We're through the tricky beveled cuts now. Us > Math. Woot!


Wednesday, June 22, 2011

Week 12

The night was a back and forth battle against mathematics as we started putting the face pieces on the cabinet and had to deal with the beveled edges. Amazingly, I somehow instinctively know the right angle to cut but I kept screwing up the overall length of the piece.

Thankfully, there were only 2 real miscues (but lots of measuring and remeasuring). We ended up cutting one piece too long and had to trim it back, and another we got slightly short but it should be workable in a different spot on the cabinet, so I don't think we actually wasted anything except time so far.

This was also a milestone night because we finally cut into the 3rd piece of plywood that I bought 12 weeks ago. Hopefully we have planned well enough that we can finish it out with that. I think it will be plenty.

Pics! When it was all said and done tonight, we got two pieces cut and fastened, but they were 2 of the trickier ones because they were small one of them had a bevel on 2 edges.


Wednesday, June 15, 2011

Week 11

Monitor Shelf... installed...


TV... resting nicely....


Support for marquee backlight... dunzo...

Wednesday, June 8, 2011

Week 10

Woot! A very significant night!

First we got the slots cut for the t-molding and tested with a sample piece. My actual design has chrome molding but the sample piece in this picture is gold.


Then we got to work on assembling the frame of the cabinet. We got everything clamped to one side to hold it in place...


Then we put the other side on top and lined everything up and screwed it in...


Then we flipped it over and screwed in the first side and stood it up!


It is nice and sturdy and everything is square and level.


We rolled it over to the corner out of the way until next week...


Wednesday, June 1, 2011

Week 9

It doesn't look like much, but we actually accomplished quite a bit tonight.

1 - Cut the shelf for the TV to the same width as the base of the cabinet, and the proper depth for the TV. Having this the right dimensions before standing up the cabinet will make it easy on us in the long run.

2 - Made another Home Depot run for 1x2s and put some strips on each panel to rest the TV shelf on. Once we get the shelf built we should not be able to just sit it inside there.

3 - Put on strips for the board that will eventually support the backlight for the marquee.

4 - Removed some stripped out screws from the base and put new ones in there to support the wheels better.

5 - Cut all the 2x4 braces to the exact needed width so that all cross pieces (base, shelf, 2x4s) are the same width now.


In the photo below you can see the side panels with the extra strips and also all of the 2x4s we cut. The TV shelf is not shown...


Hopefully this thing will be standing up next week!

Wednesday, May 25, 2011

Week 8

Major progress tonight!

We first had to make a home depot run to pick up some 1x2 boards to attach to the insides of the cabinet as nailers for plywood and 2x4s.

Here are all the pieces cut to the right sizes:


 Marked off where all we would need to attach 2x4s and plywood...


This is a nifty little edge guide we made so that we didn't have to measure where to put each board. It makes them all the same and with about a 7/16th inset from the edges of the cabinet.


Inside of the left side of the cabinet, with all support pieces glued and screwed...


And the right side...


We put them together to see how well they match up. They match pretty well...


Symmetry...


It shouldn't be too long now until we are ready to stand this thing up. It will really start looking like an arcade machine then!